In this post I describe the tools and workflow needed for a clean and simple Python development environment. Messy dependencies, mixed module versions and unknown requirements are a thing of the past. Learn to keep your development clean and free of conflicting and ambiguous versions.
The Problem
Python is loved by many for its ecosystem. You can find a library or module package for nearly anything in the Pypi repositories. Managing these libraries, packages and modules has historically been quite messy.
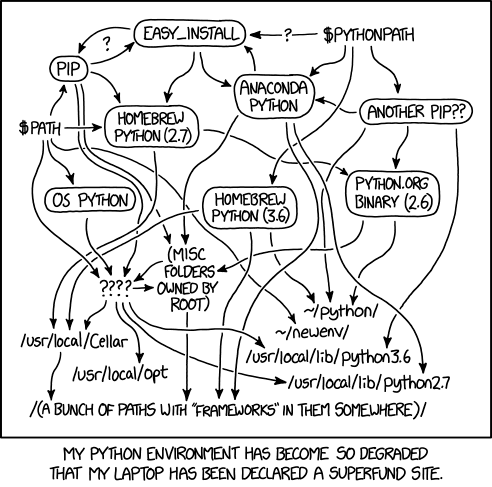
This is the situation we want to avoid. Source: https://xkcd.com/1987/
Different projects require different module and even different Python versions. For a long while writing code in Python required hacked together tools to make pip behave cleanly when working on multiple projects. Things tend to get even more messy when on a multi-user system such as on RnD servers. Virtual environment management was not user-friendly Here I share my best practices for handling multiple projects with their own environments in Python.
The approach should provide the following:
- Ease-of-use: Simple creation of virtual environments that is cross-platform, without hacky installations for tools or barely documented scripts, and installs modules straight from Pypi pip or Github repos. Easy management of packages and dependencies.
- Install and use different Python versions: Many developers -myself included- work on Python 2 legacy code, but also use the latest-and-greatest in new projects. To keep the system clean, this requires a manager for Python interpreter versions
- Distinguish project environments vs. global tools: Separate project-based virtual environments from Python command-line tools.
- Document project requirements unambiguously: Use a clear and non-ambiguous dependency graph to avoid version conflicts. This is especially handy in setting up existing projects.
While a lot of ink has flowed on Python development tools, many blog posts contain out-dated information:
Pyenv-virtualenvwrapper is often recommended.
But it has been overtaken by Pipenv, which offers a cleaner installation and more user-friendly and powerful solution to environment and module management.
Many older post also do not tackle globally installed Python command-line tools which cause confusion with multiple concurrent Python versions.
The Solution
Sadly, there is not one tool that integrates our desired requirements to a satisfactory level. In vain of the Unix philosophy -“Do One Thing and Do It Well”- we pick one tool to handle each aspect of our ideal workflow.
Pyenv, Pipenv, and Pipx meet and excede our requirements and are both mature and actively supported by the community.
Pyenv: Install different Python versions globally and locally.Pipenv: Install module packages and creates environments for your projects. Recommended packaging tool by the official Python Packaging AuthorityPipx: Install and run Python applications such as command-line tools.
Don’t feel bad if you are a long-time Python dev and have not heard of these.
Pipx and Pipenv are fairly recent additions (2018 and 2019 resp.) to the Python development toolset.
We will now go over each tool, provide installation and common-usage instructions. Then I give an example of a typical workflow for new projects.
Pyenv
Pyenv is the go-to tool for managing Python versions.
It allows for:
- Setting directory-level local Python versions for projects
- Setting a system-wide Python version on a per-user basis.
It supports the default CPython interpreter as well as pypy, anaconda, jython, micropython, etc.
Pyenv excells at handling different Python versions, but don’t be fooled by its name:
It is not a virtual environment manager. We have Pipenv for that.
Installation:
Pyenv installation is fairly easy and well-documented.
-
Linux: to install pyenv use the automated installer or follow the manual installation instructions on Github.
$ curl -L https://github.com/pyenv/pyenv-installer/raw/master/bin/pyenv-installer | bashThe installer will output some configuration code at the end that needs to be added to your shell’s rc file:
$ #ensure the following is in your ~/.<SHELL>rc (.bashrc, .zshrc, .kshrc)export PATH="$HOME/.pyenv/bin:$PATH"
$ eval "$(pyenv init -)"
$ eval "$(pyenv virtualenv-init -)"
$ export PYENV_ROOT="$HOME/.pyenv" # needed by pipenv
Finally, refresh your shell:
$ source ~/.<SHELL>rc - Windows: Use the Pyenv-win fork and follow the installation instructions
-
macOS: install via Homebrew
$ brew update
$ brew install pyenv
Post-installation actions
Once Pyenv is installed can check which Python interpreters are already on the system:
$ pyenv versions
system
If your output only says system, only the default pre-installed Python version of your OS is installed.
Now check out all Python interpreter versions that are at your fingertips:
$ pyenv install --list
Available versions:
  2.1.3
  2.2.3
...
  stackless-3.4.7
  stackless-3.5.4
To use any of these version of Python, you must first build and install them. I suggest you install the latest version (at time of writing this is 3.8.0):
$ pyenv install 3.8.0
Now install a global version of Python that is going to be used system-wide.
$ pyenv global 3.8.0
Your operating system probably comes with a preinstalled version of Python which you can now never use again or even remove.
Note: If a new Python version is released and you do not see it in pyenv install --list, you need to update pyenv with pyenv update.
Pipx
[Pipx](Pipx solves the issue of installing and running Python applications.
Python applications are pieces of end-user software written in Python.
They are often fully-fledged command-line tools such as black, cookiecutter, scrapy, glances, or the ever popular youtube-dl.
These are often Python modules that you want to be available to the user globally.
They are not dependencies in a project, so using Pipenv to manage them is ill-advised.
You want to update these packages from time-to-time as their security and functionality improves.
Pipx is a tool to help you install and run end-user applications written in Python.
Pipx is not a tool for development or publishing of your code – it’s only for consuming already published packages.
Like Pipenv it has two main components:
- An installation mode: Cleanly install, list, upgrade, and uninstall packages globally and in an isolated environment with the
pipx install PACKAGEcommand. - A runtime mode: Run the latest version of a Python application in a temporary environment with the
pipx runcommand.
Installation
This is the last time you will be using pip directly.
Pip is dead, long live Pip!
$ pip install --user pipx
$ pipx ensurepath
Usage You can install a package globally by running
$ pipx install PACKAGE
For example:
$ pipx install pycowsay
installed package pycowsay 2.0.3, Python 3.7.3
These apps are now globally available
  - pycowsay
done! ✨ 🌟 ✨
Now we can run this application like any other:
$ pycowsay "pipx is awesome"
  ____
< pipx is awesome >
  ====
         \
          \
            ^__^
            (oo)\_______
            (__)\       )\/\
                ||----w |
                ||     ||
To uninstall simply run pipx uninstall pycowsay.
To temporarily install and run an app in its own sandboxed environment:
$ pipx run pycowsay "pipx is awesome"
This will download and install and run a package, execute your command and arguments, and automatically remove it afterwards.
pipx run PACKAGE is usefull for apps you don’t use frequently and want to use the latest version.
A typical example of such an app is cookiecutter which is typically run once to set-up projects.
Updating installed packages to the latest version works like other package managers:
Simply run pipx upgrade-all to upgrade all installed apps.
Pipenv
Pipenv fetches and installs Python packages much like pip.
Pipenv also handles the creation of virtual environments.
In this sense, it puts together pip and virtualenv functionality in one user-friendly manager.
It specifies a project-specific Pipfile that contains the exact module versions and Python requirements.
This file is similar but superior to your old requirements.txt file because it contains more information and auto-generates a Pipfile.lock to avoid potential conflicts and ambiguities.
The Pipfile.lock does two things:
- Provides good security by keeping a hash of each package installed.
- Pins the versions of all dependencies and sub-dependencies, giving you replicable environments.
This avoids nasty situations like when you share a project with your colleague and their version of a library doesn’t match so the code does not run.
Simply call pipenv install in a project folder containing a Pipfile and your dependencies and virtual environment are ready to go.
Pipenv consists of two main components:
- An installation mode
pipenv installfor installing packages. - A runtime mode
pipenv shellandpipenv runfor activating virtual environments and integrating the dependencies, and running a command in the environment.
Installation:
There are several options for OS-specific installation described in the Pipenv documentation.
We choose for the “pragmatic” installation using our Pipx as Pipenv is meant to be installed globally:
$ pipx install pipenv
New Project Workflow
Let’s demonstrate how Pyenv and Pipenv work together to start a new Python project.
Make a directory in which your source code will be written:
$ mkdir test-project
$ cd test-project
Next, use Pyenv to set the local Python version:
$ pyenv local 3.8.0
This will associate that directory with Python 3.8.0 so that calling Python from within the “test-project” folder will always refer to that version of Python.
Note that you first need to install the desired version: pyenv install 3.8.0
Then we use Pipenv to simultanously install a package and create a virtual environment:
$ pipenv install numpy
Creating a virtualenv for this project…
Pipfile: /home/gilles/test-project/Pipfile
Using /home/gilles/.pyenv/versions/3.8.0/bin/python3.8 (3.8.0) to create virtualenv…
⠧ Creating virtual environment...Already using interpreter /home/gilles/.pyenv/versions/3.8.0/bin/python3.8
Using base prefix '/home/gilles/.pyenv/versions/3.8.0'
New python executable in /home/gilles/.local/share/virtualenvs/test-project-J2TrTMEi/bin/python3.8
Also creating executable in /home/gilles/.local/share/virtualenvs/test-project-J2TrTMEi/bin/python
Installing setuptools, pip, wheel...
done.

✔ Successfully created virtual environment!
Virtualenv location: /home/gilles/.local/share/virtualenvs/test-project-J2TrTMEi
Creating a Pipfile for this project…
Installing numpy…
Adding numpy to Pipfile's [packages]…
✔ Installation Succeeded
Pipfile.lock not found, creating…
Locking [dev-packages] dependencies…
Locking [packages] dependencies…
✔ Success!
Updated Pipfile.lock (456e4b)!
Installing dependencies from Pipfile.lock (456e4b)…
  🐍   ▉▉▉▉▉▉▉▉▉▉▉▉▉▉▉▉▉▉▉▉▉▉▉▉▉▉▉▉▉▉▉▉ 1/1 — 00:00:00
To activate this project's virtualenv, run pipenv shell.
Alternatively, run a command inside the virtualenv with pipenv run.
Let’s check out our Pipfile to see the exact specification of our dependencies:
$ cat Pipfile
[[source]]
name = "pypi"
url = "https://pypi.org/simple"
verify_ssl = true

[dev-packages]

[packages]
numpy = "*"

[requires]
python_version = "3.8"
As you can see, it specifies the source of our packages, the module version number (“*” meaning any version, by default this will install the latest version), and the exact Python version.
To run write and test code you need to activate to virtual environment:
$ pipenv shell
Launching subshell in virtual environment…
These three steps are all there is to it! You now have an easy to manage Python development folder which can be replicated without error.
If you need to know the path to the Python interpreter binary because you want to set it in your IDE of choice you can simply run which python from within the virtual environment subshell.
Existing Project Workflow
This is for working on an existing codebase.
The codebase can be a project you pulled off Github or a folder shared with colleagues.
If the original writer uses Pip, this means it already contains a requirements.txt file.
Even better yet, they are already on the Pipenv boat and it contains a Pipfile.lock.
When a requirements.txt file is present:
$ pipenv install -r /path/to/requirements.txt
This will install all dependencies and create a Pipfile from requirements.txt.
If the project contains a Pipfile.lock, installing and creating a virtual env is as simple as:
$ pipenv install
Installing dependencies from Pipfile.lock (456e4b)…
  🐍   ▉▉▉▉▉▉▉▉▉▉▉▉▉▉▉▉▉▉▉▉▉▉▉▉▉▉▉▉▉▉▉▉ 1/1 — 00:00:00
Et voila! You’re ready to start working.
Clean-up
The remove the virtual environment and the test-project folder:
$ cd test-project
$ pipenv --rm
Removing virtualenv (/home/gilles/.local/share/virtualenvs/test-project-J2TrTMEi)…
$ cd .. && rm -r test-project
Alternatives
- Poetry: Poetry is a snappier packaging and dependency manager to replace Pipenv. Unlike Pipenv, Poetry does not include Python interpreter versioning, is less widely used, and is not officially supported by the Python Packaging Authority. Poetry however is significantly faster when locking in dependencies and this translates to less waiting around when writing code. I will keep an eye on this promising project and follow up with an update after using it for a while.
- Conda: I personally have very bad experiences using Conda to install data-science and deep learning frameworks. Many conda packages are broken and unmaintained. While pip is integrated into Conda, pipenv is the more flexible alternative. Conda is bloated compared to other tools, suffers from feature creep, and places itself outside of the Python ecosystem.
- Flit and Hatch: very recent additions to the ecosystem which are still in their infancy. Will keep on eye on.